
How to Make a Bow Stringer
Dec 27, 2014
Whether you picked up a used recurve or long bow at a yard sale, outdoors store, or made your own, a serious bow will take some serious strength to string. While you can pass it through the legs and bend it over using your leg as a fulcrum, I would strongly advise against it. If something were to go wrong down there — the bow slips or breaks –, you might injure your arrow if you catch my drift. You can pick up a bow stringer for about $10-$15 or you can make your own in about 10-15 minutes. Here’s how to do it.
How to Make a Bow Stringer
The Supplies You Need
- Hammer
- Large philips-head screwdriver
- Spare block of wood (for hammering on)
- A spare piece of leather (at least 4″ x 3″) found at any craft store
- Scissors or other tool to cut the leather
- Over 6′ of strong Nylon rope or other cordage
- Tape measure or ruler
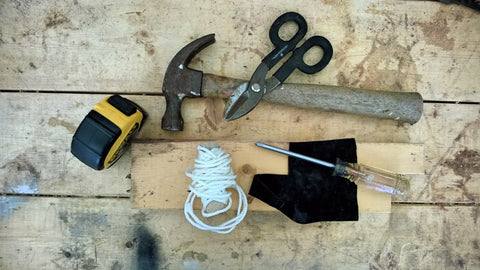
The supplies you’ll need before getting started.
Step 1: Cut 2 strips of leather, 1 1/2″ x 4″
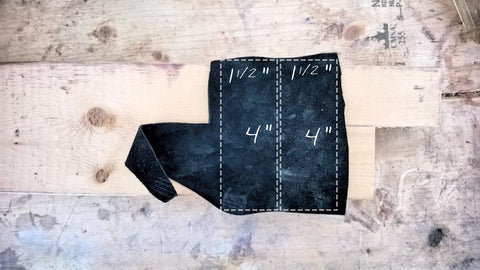
Cut the leather into 1 1/2″ x 4″ strips
Step 2: Punch holes into leather with screwdriver
Place the strips of leather on top of the block of wood. Hammer the screwdriver into the leather until it easily passes through.
Note: Use a fairly large diameter screwdriver to make sure the rope will pass through with ease.

Punch hole into leather with screwdriver.
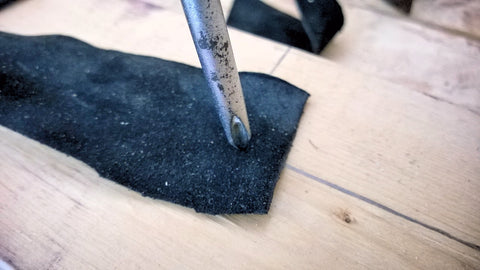
Don’t punch the hole too close to the edge.
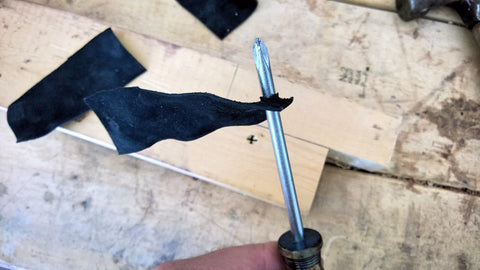
Pass the screwdriver through a few times to stretch the hole.
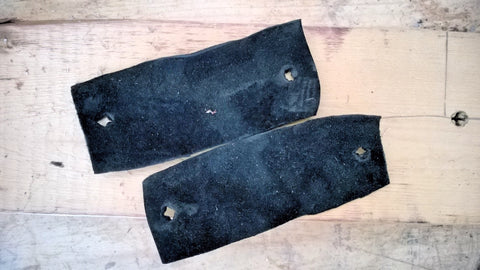
Your leather strips should look something like this.
Step 3: Cut and seal the rope
Cut the rope to over 6′ in length. It is better to be on the longer side. 6.5′ is just fine. You will want the bow stringer to be fairly loose and easy to step on.
Seal the ends of the rope (if using nylon) with a match.
Note: There is evidence of about 5 projects taking place at once on my work bench!
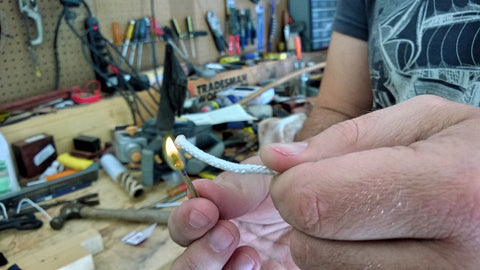
Seal the ends of the rope to prevent fraying by using a match.
Step 4: Pass the rope through the strips of leather
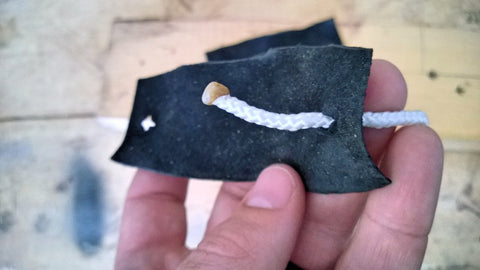
Pass the rope through the holes in the leather.
Continue to through the other side.
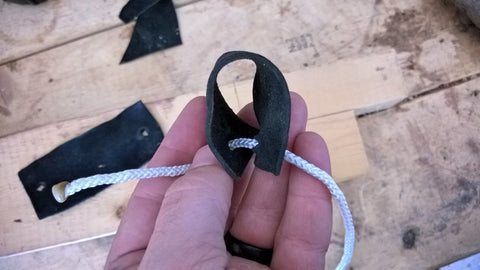
Create a loop with the leather strip by pulling the ends together.
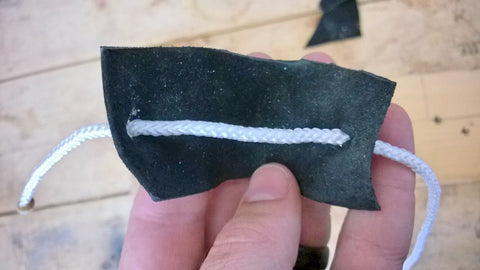
Step 5: Tie an overhand loop knot in the rope
Here is how to tie an overhand loop knot:
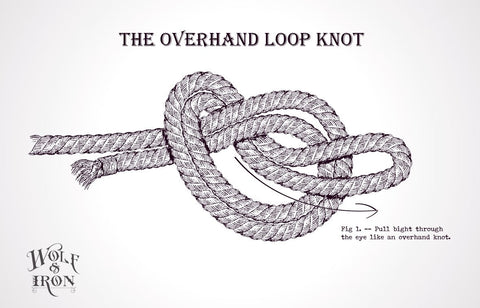
How to tie the overhand loop knot.

Tie an overhand loop knot in the end of the rope.
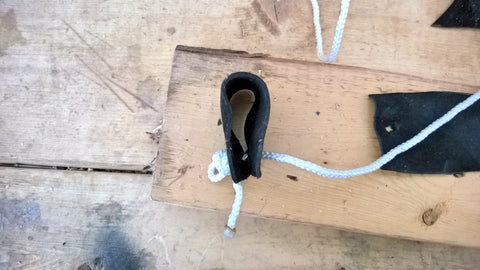
Pull the leather tab to the knot to test it out.
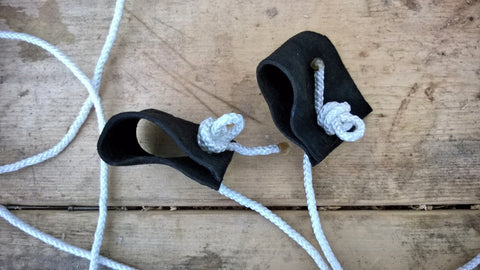
Repeat the process on the other side of the rope.
Complete!
Your bow stringer is ready to use. Go slow the first few times you use it to make sure that knots hold and the rope doesn’t break!

