
How to Frame a Coffee Sack with Pallet Boards
Jan 05, 2015
“To me, the smell of fresh-made coffee is one of the greatest inventions.” – Hugh Jackman, Actor, Wolverine, Coffee Lover, Aussie, 1968-Current
 “To me, the smell of fresh-made coffee is one of the greatest inventions.” – Hugh Jackman, Actor, Wolverine, Coffee Lover, Aussie, 1968-Current
Well said, Hugh! If you like coffee, consider this a tribute. This is a cool, easy, and manly project that even the most novice of craftsmen can pull off. Framing a burlap coffee bean sack using weathered boards is an idea I had about a year ago, but alas it takes a while for the pallet boards to become weathered. The pallet wood I am using in this DIY walk-through has been sitting outside my home for about a year, and the coffee sack is a unique, vintage piece I picked up from eBay. I had a few coffee bean sacks that I picked up from local coffee shops, but they didn’t really have the unique look I was hoping for. As an alternative to coffee bean sacks you can use an old feed or seed bag as well.
If you like coffee, and I know you do, and you like rustic, manly, hardwood, hand-made wares to adorn your roost, this project is for you!
Supplies You’ll Need
- Coffee Bean Sack
- Cardboard (for backing the coffee sack and frame)
- Pallet or Other Weathered Wood
- Crowbar, Hammer, etc. for Dismantling Pallet
- Duct Tape
- Table Saw or Bandsaw for Cutting Lap Joints
- Liquid Nails or Wood Glue
- (Optional) Roller Cutter for Making Straight Cuts in Burlap and Cardboard
Step 1: Back the Coffee Sack with Cardboard
The first and most important step is ensuring your burlap sack is square or rectangular so that it fits nicely in the frame you are going to make. To do this, you will need a piece of cardboard to back the coffee sack.
The goal is to cut the cardboard to the appropriate width and height so that the coffee sack art is centered appropriately but also allowing the coffee sack to be folded around the cardboard and taped.
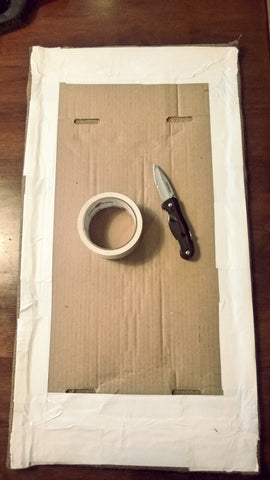
Note: Ensure the cardboard is square as this will fit snugly in your frame.
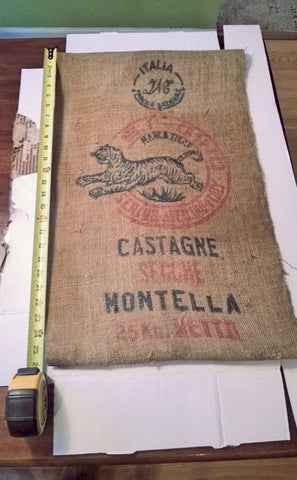
Lay the coffee sack out on the cardboard, fold the edges in, and ensure the length and width are the same on both sides. Mark and cut out the cardboard to match the width and height.
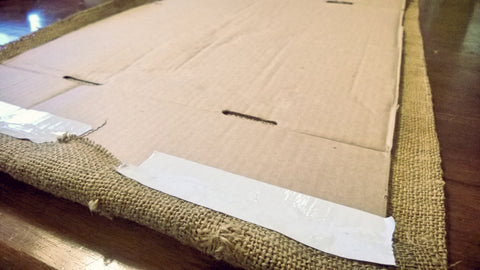
Tape the remaining coffee sack edges over and behind the cardboard.
Tape the coffee sack well so no frayed ends pop up over time.
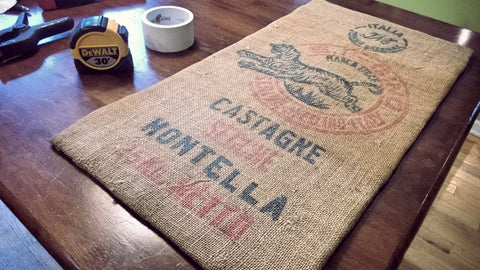
The finished, backed coffee sack ready for a frame.
Step 2: Dismantle the Pallet Boards and Choose the Best Ones
Separate the pallet boards being careful not to split or dent the boards in the process.
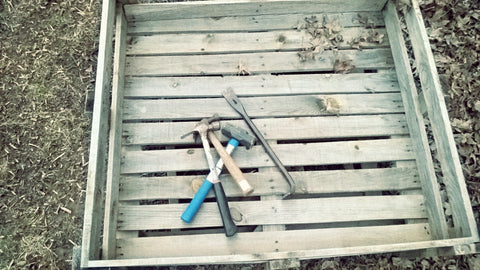
Any pallet will do, just make sure it has a nice weathered appearance but not rotting.
Once the boards are separated, lay them out and choose the ones you want. I prefer the ones with some character: knots, bends, nail holes, etc.
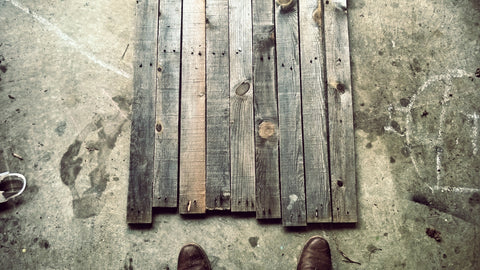
Once the boards are separated and the nails pulled, lay out the boards and choose the ones you like.
Step 3: Lay Out the Frame and Cut to Length
Determine how you want the frame to appear around the center piece. Lay out the boards so that the wood features and characteristics are set where you would like them. Make sure everything is square by measuring the height, width, and corner to corner, making adjustments as necessary. Mark the ends of the boards as they will be cut off then head to the saw and make the cuts.
Note: Make sure you remember or mark which boards are left, right, top, & bottom so you don’t get them mixed up after making the cuts.
Lay the boards as they would be framed around the coffee sack, ensuring the frame is square. Mark the boards and make your cut on the saw of your choosing.
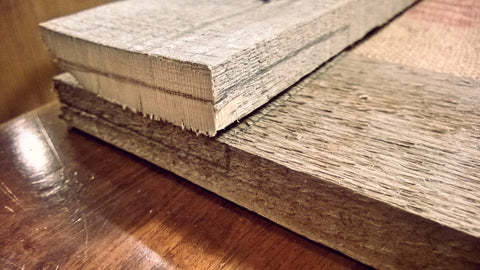
Step 4: Make the Half-Lap Joints and Glue
The frame actually looks pretty good in the picture above and I assume you could mount it and hang it as is, but that isn’t the look we are going for. We want to use a joint called a half-lap joint rather than the usual 45° cut we see in picture frames. There are a few reasons for this that go beyond aesthetics which are important that you will want to add to your database of man-knowledge.
1. More surface area for joining
We are going to do a glued joint here because…well…it’s easy and doesn’t detract from the rustic look we are going for. Lap joints provide more of an area to glue which means the frame will hold up better in the long run.
2. Weathered boards will pull apart over time
The most important reason for doing a half-lap joint is that weathered boards, acclimated to the change of seasons out-of-doors but not the stable, dry conditions indoors, will shrink and pull apart from each other. Technically they will pull a certain direction depending on the run of the grain. The important thing to note is that reclaimed lumber which has been exposed to the elements is not settled or kiln dried like the stuff you get in stores.
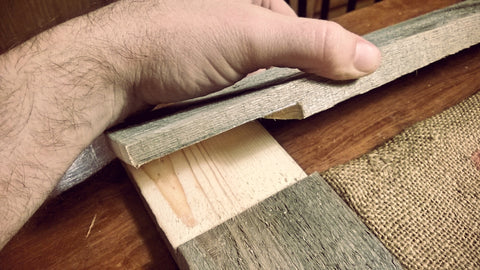
I marked my lap joints by freehand and cut them out on a band saw. Honestly, if I had a dado blade and a table saw or a router it would have been easier, and probably safer, but I had good results. You can do this all by hand, even using a chisel. The cuts don’t need to be perfect.
Mark the lap joints by eye and freehand.
After cutting out the lap joints the boards should overlap each other creating resulting in a frame the width of one board.
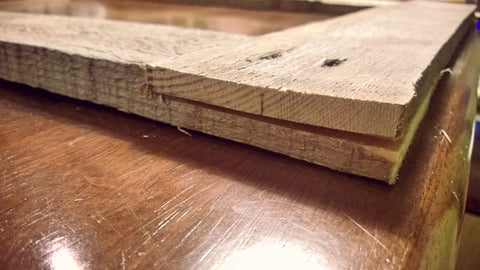
The lap joints may not be perfect, but that is part of the rustic charm. Plus, glue and clamps will take care of that.
Double-check for squareness and fit, then glue and clamp the boards. I decided to use Liquid Nails because of the unevenness and gaps in the boards. If you have a tight fit then Titebond would work better. The drawback to Liquid Nails is that it takes about 2-3 days to cure. Titebond will be ready after a half-hour.
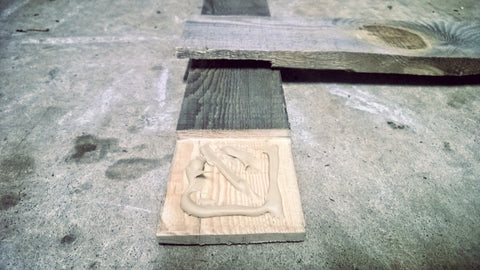
Use Liquid Nails if you have uneven joints. Use wood glue if you have tight-fitting joints.

Clamp, being careful not to mar the wood with clamp pressure. Drying time for Liquid Nails is a few days at 60° and about 30 mins to an hour with Titebond wood glue.
Step 5: Mount the Coffee Sack into the Frame
Hopefully the matted coffee sack fits nicely into the frame. We are going to use more duct tape and another piece of cardboard to hold it securely in place.
Cut a piece of cardboard the same dimensions as the inside of the frame. We want a snug fit here.
With the frame face down and the coffee sack picture also face down inside, tape the coffee sack matting to the frame (See the white strips of tape peeking out of the cardboard in the below picture.) then cover with the cardboard. You can tape the cardboard backing down as well — I did — since this is just to add some sturdiness to the picture and won’t be visible.
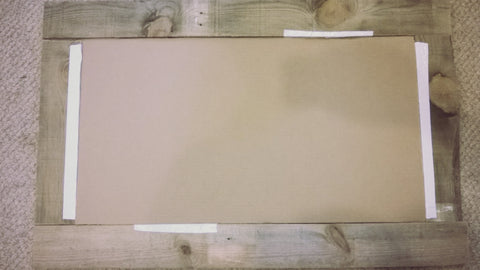
Place the frame face down and the matted coffee sack facedown as well. Tape the picture to the frame (seen by the white strips of duct tape) and place the cardboard on top to cover the back.
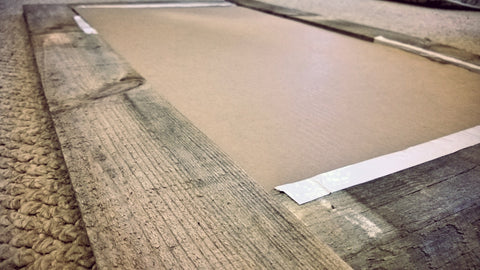
The cardboard backing is just a cover for the back of the coffee sack matting. It can also be taped to the frame if necessary.
Step 6: Hang the Picture
The next step is the easiest. All you need is some picture hanging hardware. I am partial to the keyhole style hangers but you could stick with the rustic theme and use a wire.
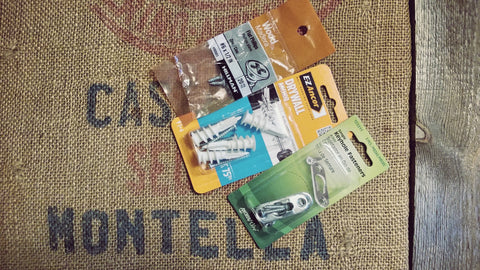
To hang this project I decided to use the keyhole hangers and necessary parts. I’m not a fan of nails for pictures so I always use heavy duty anchors. Plus, the anchors are reusable.
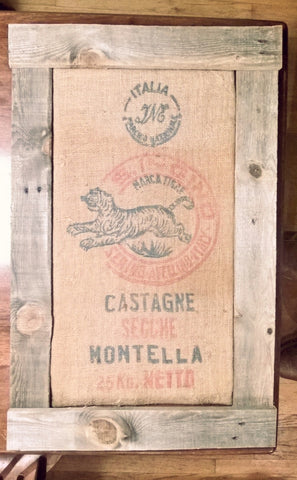
The Finished Product
Hopefully yours looks as good or better than this one! If you decide to do one like this, share a picture of Facebook, Instagram, Twitter and tag Wolf & Iron, or in the comments below.
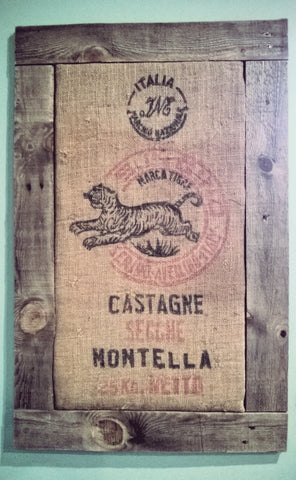
Here’s the finished product! Looks pretty nice hanging in a manly corner of my house.

