How to Iron Your Shirts and Pants
Aug 20, 2014
“Clothes and manners do not make the man; but, when he is made, they greatly improve his appearance.” – Henry Ward Beecher, American Preacher and Abolitionist (1813 – 1887)
I suppose this is one way to put the ‘Iron’ in Wolf & Iron though it isn’t really what I had in mind ;-). Before the military I assumed that ironing was “woman’s work” as it was always the women in the family that did that particular job. Unfortunately they don’t issue mothers and grandmothers in the Navy so I had to pick up this skill pretty quickly. I know a lot of guys that still have their mom iron their clothes or send them to a cleaners. I still do it myself because 1. I know how and 2. It is a good chance to listen to some tunes and let my mind wander.
Tip: If you can take a shirt fresh out of the dryer you might be able to hang it without ironing. However, for formal shirts (like you would wear with a tie) you’ll need to iron them and maybe add a bit of spray starch as well. Also, if you buy high quality shirts and slacks with a thicker fabric (higher density weave) the ironing process will be much easier and they will keep their form throughout a day at the office.
Another Tip: Don’t iron over any grease spots or other stains. That will only set them in.
How to Iron a Shirt
Step 1: Ironing board and Iron
You’ll obviously need these. The iron should have settings for the type of material you’ll be ironing. When getting out tough creases you will need to use steam. This isn’t rocket science. If you see the shirt getting too wet you can cut back on the amount of steam you are using. Also, if purchasing an ironing board, get the heaviest one possible. Otherwise, they tend to rock and the iron may fall between uses.
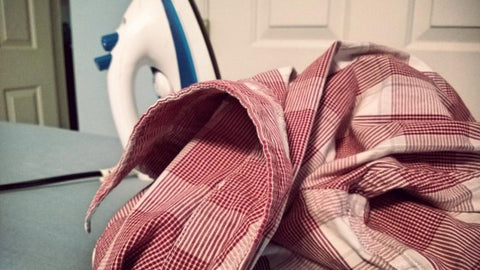
Things you’ll need: Ironing Board and Iron. Duh.
Step 2: Ironing the front of the shirt
The larger end of the board is where you will do most of the work. The key is to keep the shirt nice and flat so you don’t add more wrinkles as you iron.
Keep the iron moving, not allowing it to rest in a spot for more than a second or two. Steam will help prevent scorching the shirt. Repeat on the other side.
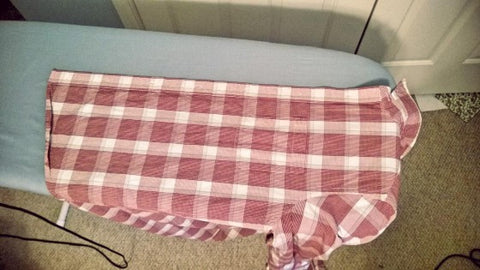
Stretch the shirt over the board until the armpit is on the edge of the board.
Step 3: Ironing the back of the shirt
Stretch the back of the shirt out on the board. One gotcha for ironing the back is the pleated strip down the top-center. In most cases you can leave that alone, or just very carefully iron it down with the tip of the iron.
You will likely have to pull the shirt to one side of the board and then the other since the shirt is usually larger than the board.
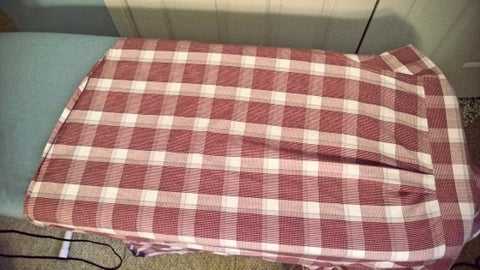
Stretch the shirt over the board to iron the back. If it doesn’t look too bad, don’t worry about the pleat in the top-center of the shirt.
Step 4: Ironing the sleeves
For ironing newbs the sleeves are the trickiest bit, but once you understand the mechanics of it, it really isn’t that bad.
First, unbutton the sleeves. Second, pinch the fabric about an inch above the shoulder seam. Third, lay the sleeve down so that it is folded on the seam under the sleeve. Have a look at the images below for what I mean.
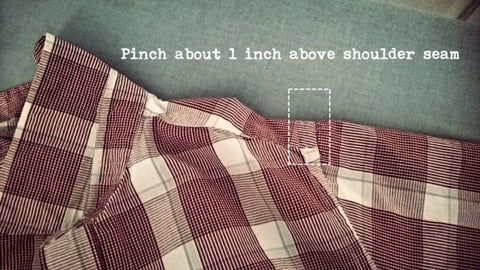
To lay the sleeve flat, start by pinching the sleeve at the top just above the shoulder seam.
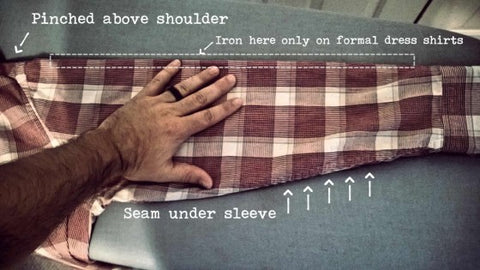
Lay out the sleeve flat and smooth with your hand. Don’t iron the top of the sleeve unless it is a formal shirt that requires a visible crease.
Step 5: Iron the collar
To iron the collar, simply lay the collar as flat as possible and iron it out. Since the collar is thicker than the rest of the shirt, steam is going to be really important here, especially if you have any curled tips.
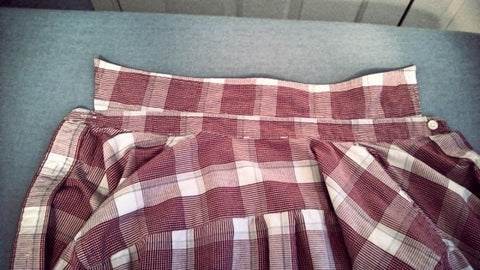
Lay the collar flat and iron it out.
How to Iron a Pair of Pants
Ironing a pair of pants (or slacks) is a totally different animal than a shirt. Here is how I do it.
Step 1: Fold the pants
The secret to ironing pants is to lay them flat. You can just lay each pant leg out flat so that the seams are on the sides of the pants and iron each leg, but you won’t be able to put a crease in the front and back of the legs if necessary on a more formal pair.
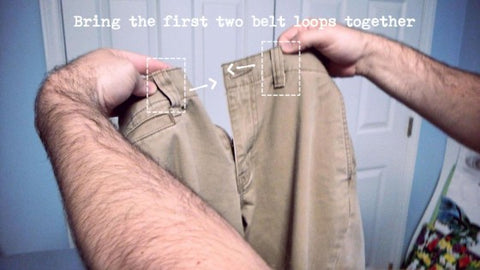
Bring the first two belt loops together so that they touch.
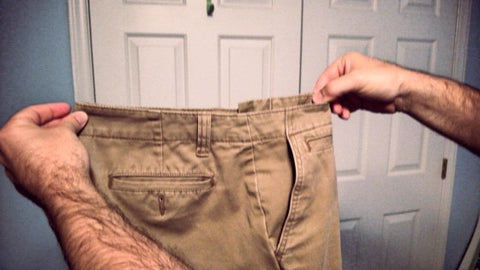
Bring the loops together and the pants should hang well. This is how you can hang them in the closet as well.
Step 2: Lay the pants out along their side
Lay the pants out flat along their side, keeping the seams at the bottom together.
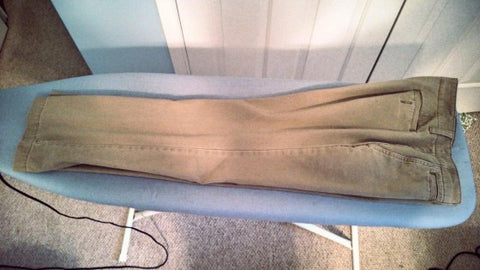
The seams at the bottom of the leg should touch.
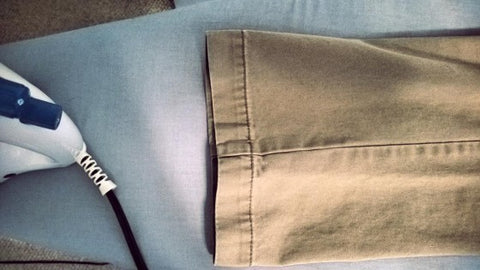
Lay the pants out flat out on their side.
Step 3: Fold one leg back and iron
Fold the top leg back so that you are ironing only the inside of the leg (thigh). Avoid ironing over the seams (including the one underneath) as it will leave an unsightly imprint. Flip the pants over and repeat on the other side. Don’t iron along the outside edge of the pants unless you want a crease down the front and back for a more formal look.
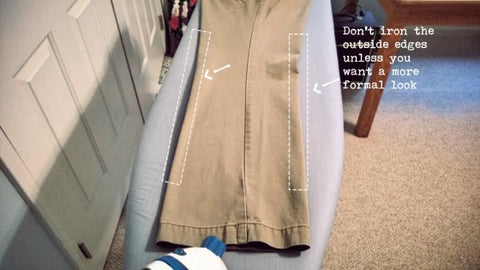
Fold one leg back to iron the inside thigh. Avoid ironing the outside edges unless the pants are formal.
Step 4: Iron the pockets and top of pants
We’ll finally get to use the horn of the ironing board for the pocket areas on the pants. The key here is to move the inside pocket flaps out of the way so that we don’t have an imprint when passing over their area.
Pull one pant leg onto the horn of the ironing board (I don’t know if it is called a horn or not) with the front pocket face up. Reach inside and pull the front pocket material out of the way. Repeat on the other leg.
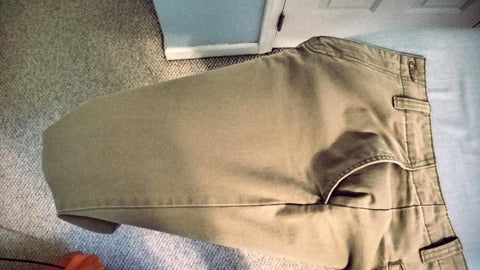
Pull the pants onto the front of the ironing board and pull the pocket out of the way of where you are ironing.
The strategy is similar for the back pockets.
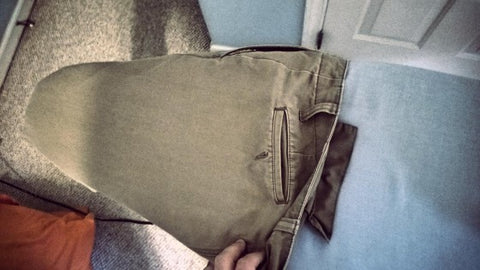
Pull the back pocket flap up and out of the way so that it doesn’t make an imprint when ironing.
That’s all there is to it!

 “Clothes and manners do not make the man; but, when he is made, they greatly improve his appearance.” – Henry Ward Beecher, American Preacher and Abolitionist (1813 – 1887)
