
Traditional Archery: Part 4 – How to Shoot a Bow Instinctively
Feb 08, 2016
“In archery we have something like the way of the superior man. When the archer misses the center of the target, he turns round and seeks for the cause of his failure in himself.” – Confucius, Chinese Philosopher, 551 BC-479 BC
 “In archery we have something like the way of the superior man. When the archer misses the center of the target, he turns round and seeks for the cause of his failure in himself.” – Confucius, Chinese Philosopher, 551 BC-479 BC
Whereas a compound bow is fitted to a particular archer and a particular draw, with a particular set point — often the tip of the nose — a traditional bow literally has no rules as to how it is shot. There are no sights or mechanisms to aim, thus the term “instinctive shooting” applies to traditional archery; the archer shoots by instinct which is honed over time. There are a few drawbacks to this method of shooting, but none that should prevent you from pursuing it. Firstly, the learning curve is a bit steep, though it is fairly simple. Secondly, an archer will become best at shooting his own bow and particular set of arrows. This is not usually an issue, but unlike a compound bow which may be traded to another man of similar size and strength, a traditional archer is in tune with his own bow. If a new bow or set of arrows is needed, the traditional archer can usually adapt to the nuanced differences fairly quickly.
Stuff You Will Need
Besides your bow, arrow, and target there are a few items you will want to either make or pick up before shooting your bow.
Forearm Guard
Your non-dominant hand’s forearm has a tendency to get slapped by the string, resulting in welts and a not so happy archer. You can pick one of these up fairly cheaply at any outdoors store or here but I have found that a thick, elastic ankle brace works as well. I had one around the house and decided to try it out. I actually prefer it over my forearm guard.
Note: You can avoid a good deal of string slap by making sure your brace height of the string is 7+” and cantering your non-dominant elbow to the outside. Not every angle of shot will allow this so it is good to have the gear on hand.
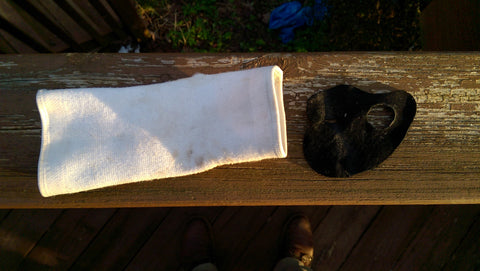
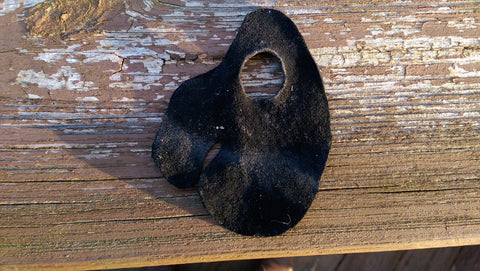
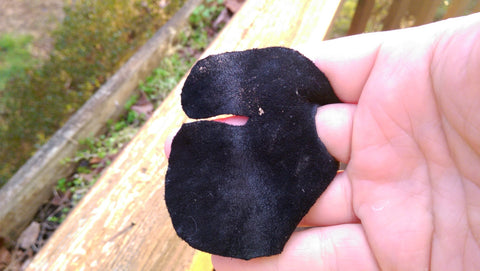
Archery Shooting Glove or Finger Tab
The draw on the string maintains constant pressure on the tips of your dominant hand. The build of up blood pressure and force of release leads to swollen fingers and a short archery session. Furthermore, the discomfort prevents the archer from fully drawing or maintaining form and thus moots his practice.
A shooting glove is as you might expect, a 3 fingered glove that pads the fingers and increases the grip of the string. A finger tab is usually a small piece of leather that performs the same function in a smaller size. The finger tab can actually be made out of a bit of used suede leather as I have done.
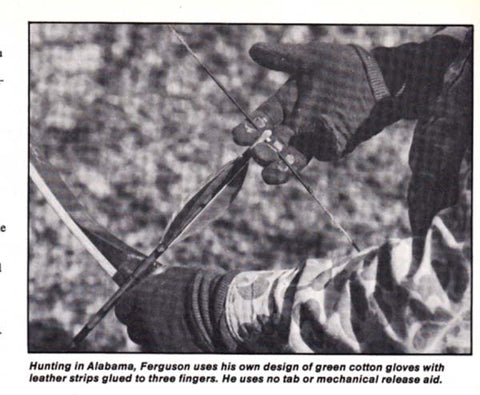
Archer Byron Ferguson glued leather strips onto a cheap pair of gloves to accomplish this goal while keeping his other fingers warm.
Finger Placement for Draw
“Draw not your bow till your arrow is fixed.” – English Proverb
There are two primary methods of gripping the string that westerners have adopted. There are many more throughout the world, in fact, while the bow and arrow is a universal primitive weapon, the ways in which the instrument is used varies. However, we’ll focus on the two most popular. Either grip is fine, it really has to do with personal preference. Each grip uses the same 3 fingers: index, middle, and ring.
Split Finger Draw
The split finger hold is necessary for arrows that do not tightly nock to the string. Most strings will have a “serving” which is extra string wound around the area where the arrow is nocked. This both increases the life of the string, but also provides a snug fit for your arrow so it will not fall off the string or slide up and down.
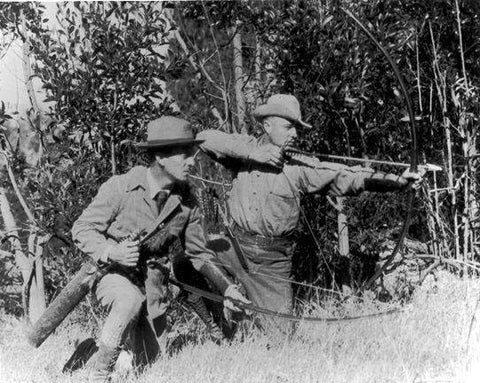
To perform the split finger hold, place your index finger on top of the nocked arrow and the other two fingers below. You can see an example of this from legendary archer Fred Bear.

Fred Bear using the split finger technique for his draw grip.
Three Under Draw
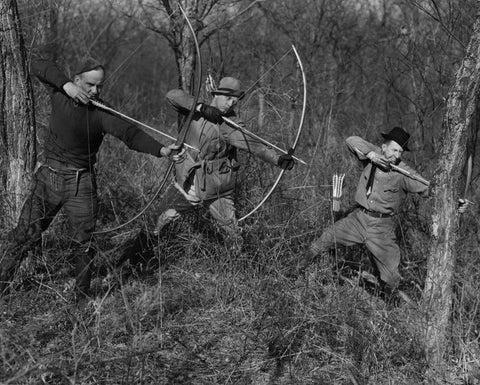
The Three Under hold is also a popular style and has been used by many great archers. For this hold, the 3 fingers go under the arrow. Assuming the arrow is nocked snugly, you should not have to worry about it sliding around.
Art Young is seen in the picture below using a three under draw.
Art Young draws with a three under hold while Saxton Pope looks on.
Taking the Shot (Instinctively)
The principles of shooting a traditional bow are similar to that of a compound, yet the traditional bow allows more flexibility in shooting style. As a beginner, you will want to shoot the same way over and over and make small adjustments to hone your accuracy. Once you have been shooting for a while and have a “feel” for where the arrow is going to go, you can begin taking more advanced shots.
Finding Your Anchor Point
An anchor point is typically a spot on your face that can be touched either by the string or one of your draw fingers. Take a look at the picture below. Each archer has a different anchor point; for one, the chin, for another the corner of the lip or some other spot. Your anchor point is critical, especially when starting out. This helps keep your draw length the same which affects the speed of your arrow. It also anchors your body into a repeatable position that will help you become more accurate.
3 archers with slightly different anchor points and stances.
How to “Aim”
Because there is no mechanism for aiming on a traditional bow you cannot simply line up a sight and release the arrow. This becomes especially difficult when shooting at distances. Compound bows have varying means of gauging the distance between the archer and the target. Not so with traditional bows, but there are ways to “aim” when first starting out. This is simply guestimating, usually by the gap between your target and the tip of your arrow. You may find your arrow needs to be a bit over the target or a bit to the left or just below, etc.
Another method that works well for beginners is to point your brace hand’s index finger at the target as you shoot. As this finger is just below the arrow it serves as a guide.
The Release
To let the arrow fly, you simply let go. There is no magic here. However, do your best to keep your bow in the same position and your draw hand in the same position after the release. If it was a good shot you are going to want to know what you did differently. Was the bow cantered a bit? Is your stance wider or shifted? Did you move your anchor point? By examining the small nuances you can repeat them and become a better archer.
Final Thoughts
Traditional archery comes with unique challenges that a lot of men are looking for. We don’t simply want a hunt, we want a sport, and a challenge that calls us to become better in some way. Our desire for bettering ourselves is often bound up in some practical means of doing so. By undertaking a more primitive means of survival, we are honing our primitive skills and connecting to ourselves and our past. Nothing will make you appreciate your ancestors more than knowing first hand how hard they had it, and how brilliant and skilled they were to survive — and thrive — on no more than stick and string.

